A warehouse can look spacious on a floor plan and still feel crowded during a busy shift. A forklift waiting behind a picking cart, a pallet blocking a cross-aisle, or a long walk to fast-moving stock can reveal problems that drawings miss. The goal is not simply to fit more racks into the building. It is to help people, products, and equipment move through the space with fewer delays and less unnecessary handling. Learning how to optimize warehouse layout with handling equipment begins with observing real work, not guessing from a diagram. Small details matter. A narrow turning area may slow a lift truck, while a poorly placed packing bench can create repeated trips. Equipment choices also shape what is practical: pallet jacks, forklifts, conveyors, and order-picking vehicles each need suitable space and clear routes.
This guide looks at how storage zones, travel paths, picking areas, and handling equipment can work together. It also considers practical constraints, including aisle width, load characteristics, visibility, and the equipment manufacturer’s operating guidance. Before moving racks, record order patterns and watch a normal shift. Note where queues form, where workers double back, and which products are handled most often. Then compare possible changes against those observations. Not every warehouse needs conveyors or a complete redesign. Sometimes moving popular stock closer to dispatch is enough. Real warehouses are messy, and a change that helps one shift may complicate another. That deserves a second look. A useful layout should support safe, steady movement while leaving room to adapt as inventory, volumes, and workflows change.
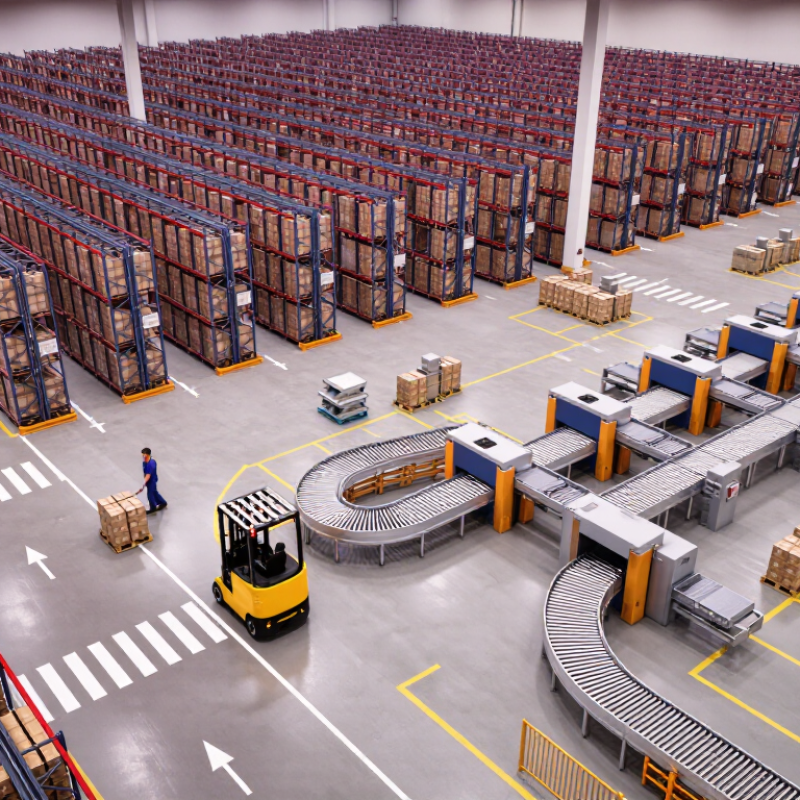
A useful warehouse layout starts with an inventory picture, not a floor-plan template. Record each item’s dimensions, weight, storage needs, and handling frequency. Separate fast movers from slow stock, but check seasonal demand before assigning permanent zones. Start with the facts. A pallet picked every day may need a direct route to dispatch, while reserve cartons can sit farther away. Compare stock levels across several weeks; one unusually busy day can distort the average. Then check the exceptions.
Orders shape the next decision. Review order lines, units per order, cut-off times, and typical batch sizes. Single-item orders may benefit from shelving near packing. Bulky, multi-line orders may need wider staging space. Walk the routes staff actually use, and note crossings, queues, and repeated backtracking. Some days look different. That is useful evidence, not noise to ignore.
Material flow links storage, picking, packing, and shipping. Mark where loads change direction or wait, then match equipment to those tasks. Hand trucks suit some small-load routes; pallet-handling equipment needs suitable turning space and clear travel paths. A polished flow diagram can miss a temporary staging pile beside a busy aisle. Recheck the layout after product ranges, order patterns, or equipment change, and leave room for those awkward exceptions.
Map the warehouse as a sequence of real movements: receiving, put-away, storage, picking, packing, and shipping. Mark each handoff, queue, and crossing point on a floor plan. A pallet jack turning beside a busy packing bench may look harmless on paper, but it can slow both teams. Keep fast-moving items near picking and packing, while reserving clear travel lanes for forklifts and carts. Small details matter.
Choose handling equipment to fit each movement, not the other way around. Pallet jacks can serve short, level transfers; forklifts need turning space and safe access to pallet locations. At packing, position cartons, scales, and completed orders within easy reach. Then trace one typical order through the building and record walking distance, waiting time, and backtracking. It will not be a perfect test. Staff may work differently during a rush, so observe more than one shift.
MHI and Deloitte’s 2024 Annual Industry Report found that 55% of respondents were increasing supply chain technology investment. That points to growing interest in better tools, but equipment alone cannot fix a poor route.
Track dock-to-stock time, picking accuracy, and orders shipped on time before and after changes. If congestion moves from receiving to packing, revise the map rather than assuming the first design worked.
Choosing handling equipment starts with the load, not the catalog. Record each item’s weight, dimensions, center of gravity, packaging, and movement frequency. A pallet of bottled goods behaves differently from long sections or fragile cartons. Check floor capacity, aisle width, turning space, dock height, and clearances before selecting trucks, carts, conveyors, or lift tables. Small measurement errors can create daily bottlenecks.
Then map the actual travel path. A hand cart may suit short, frequent trips, while powered trucks can move heavier loads over longer routes. Conveyors help when volume is steady and destinations repeat, but they can limit changes in product mix. It is easy to assume the busiest aisle needs faster equipment. Often, waiting at a shared doorway causes more delay. Track trips per hour, peak periods, queue time, and empty return travel. Match equipment capacity to peak throughput, with a modest buffer rather than a guess. Test a small area first. Watch operators handle awkward loads, pause at crossings, and reach for controls. Those details can show whether equipment fits real work—or only the floor plan.
Estimated pallet transfers per labor-hour for a representative 30 m one-way travel route. Use the comparison as a planning scenario, then validate it with a site time study.
Match equipment to load weight and dimensions, aisle width, travel distance, and peak throughput. These scenario estimates are not guaranteed equipment specifications; actual performance varies with route design, operator, load, and operating conditions.
A practical warehouse layout starts with the work, not the drawing. Place receiving and inspection near the inbound dock, with clear access to put-away areas. Keep fast-moving items close to packing and dispatch to reduce repeated travel. Store bulky or heavy loads where handling equipment can reach them without tight turns. Leave buffer space for temporary pallets; these often appear during busy shifts, even when the plan says otherwise. A taped floor outline can help teams test zone boundaries before permanent markings go down.
Set aisle widths according to the equipment’s turning radius, load size, and safe operating needs. Check the equipment specifications, then test routes with a typical load—not an empty vehicle. Map one-way paths where they reduce crossing traffic, and separate pedestrian walkways with visible floor markings. At blind corners, use mirrors or marked stop points where suitable. Walk the route during a busy period. A layout that looks tidy on paper can still create awkward turns. Watch for blocked access, queues, and repeated detours, then adjust the zones or route. That friction matters. Recheck the plan after inventory or equipment changes, since a once-clear aisle can become a bottleneck.
Evaluate the layout with shift-level data, not a polished floor plan alone. Track travel distance per order, picks per labor hour, replenishment delays, equipment idle time, and near-miss locations. WERC’s 2023 DC Measures report gives a median order-picking accuracy of 99.5%, a useful benchmark—not a promise that every operation should match. Compare your results by zone and shift; a strong site-wide average can hide a congested aisle or repeated mis-picks. Measure before changing rack positions or handling equipment.
Then test one change at a time. For example, relocate fast-moving cartons nearer to dispatch, widen a turning point, or adjust reach-truck routes. Record the effects on throughput, travel, damage, and safety over several weeks. MHI’s 2024 Annual Industry Report found that 55% of respondents planned to invest in robotics and automation within five years. That trend makes equipment fit worth reviewing, but automation will not fix a poor process by itself. A clean map can still lie. Watch real operators during peak periods; note where they wait, reverse, or leave equipment parked. The first redesign may disappoint. Treat that result as evidence, revise the assumptions, and retest with the same measures.
Record each item’s dimensions, weight, storage needs, and handling frequency. Check several weeks of stock data, not one unusually busy day.
Place frequently picked items near picking, packing, or dispatch. Review seasonal demand before fixing their locations.
Single-item orders may suit shelves near packing. Bulky, multi-line orders need wider staging areas and clear access.
Show receiving, put-away, storage, picking, packing, and shipping. Mark handoffs, queues, crossings, and places where loads change direction.
Trace a typical order through the building. Record walking distance, waiting time, and backtracking across more than one shift.
Match equipment to each task. Leave turning space for forklifts and clear travel paths for carts and pallet-handling equipment.
Track travel distance per order, picks per labor hour, replenishment delays, picking accuracy, and on-time shipping. Compare zones and shifts.
Change one thing at a time, such as moving fast-moving cartons closer to dispatch. Measure throughput, travel, damage, and safety for several weeks.
Treat the result as evidence. Watch operators during busy periods, revise the assumptions, and test again. A clean map can still lie.
How to optimize warehouse layout with handling equipment begins with understanding what moves through the facility and how it moves. Review inventory characteristics, order patterns, load sizes, and throughput needs, then map each step from receiving and storage to picking, packing, and shipping. This reveals where materials travel, where delays occur, and which activities need convenient access.
Choose handling equipment that suits the loads, travel distances, and expected volume. Arrange storage zones and aisles to support safe, efficient movement, and plan equipment routes to reduce congestion and unnecessary travel. After putting the layout into operation, evaluate measures such as travel time, order accuracy, space use, and throughput. Use the results to identify bottlenecks and refine zones, routes, or equipment choices as needs change.
DLI AutoLogix